Make Your First Map
This tutorial takes you from an empty map to a .map file a Rust server can load. Each step links to the page that explains the tool in full.
Before you start
- RustEdit is installed and has found your Rust game. See Installation.
- You know how to fly the camera: hold the right mouse button in the scene view and use W A S D. See The scene view.
1. Make a new map
- Open , or click New on the tool bar.
- RustEdit asks if you want to start a new scene, because unsaved changes are lost. Click Confirm.
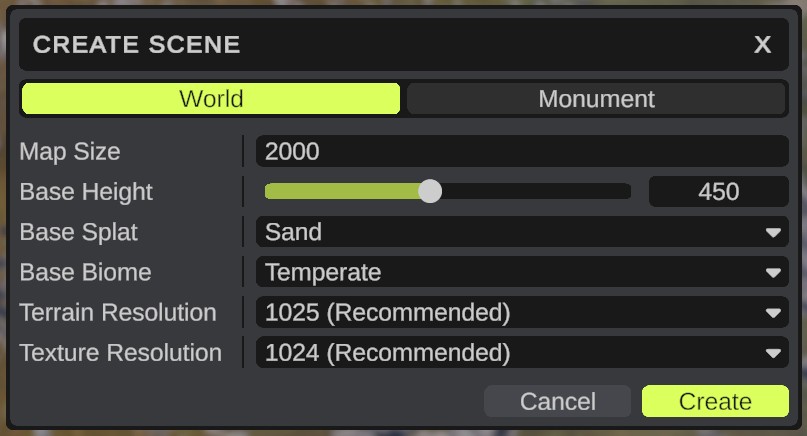
- The Create Scene dialog opens. Keep World picked at the top.
- Set Map Size to
2000. This is the width of the square map in meters. You can type1000to8000. - Leave Base Height, Base Splat and Base Biome as they are. They set the height, ground texture and biome the whole map starts with.
- Leave Terrain Resolution and Texture Resolution as they are. They start on the values marked (Recommended).
- Click Create.
RustEdit makes a flat map with your settings.
A map bigger than 6000 shows a warning: the server needs the RustEdit 2 server extension to run it. See Create, open and save.
2. Shape the terrain
- Click Terrain Tools on the tool bar. The Terrain Tools panel opens.
- Click Sculpt at the top of the panel.
- In the tool list, pick Raise/Lower Height.
- Pick a brush and set its Size and Strength.
- In the scene view, hold the left mouse button and drag over the ground. The ground goes up.
- Hold Alt while you drag to lower the ground instead.
- Pick Smooth Height and drag over sharp edges to soften them.
Press Ctrl+Z to take back a change.
See Height tools and Brushes for all the sculpt tools.
3. Paint the terrain
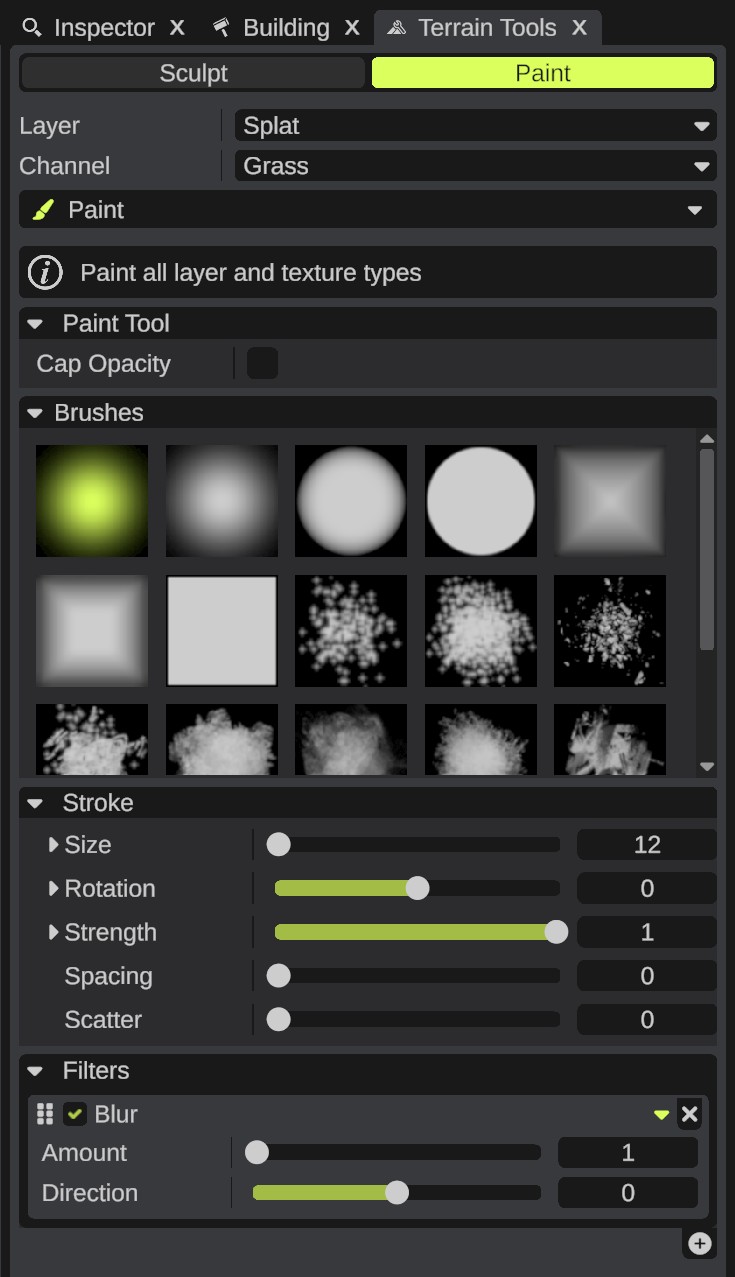
- In the Terrain Tools panel, click Paint.
- Set Layer to Splat. This is the ground texture.
- Set Channel to the texture you want, for example Grass.
- In the tool list, pick Paint.
- Drag over the terrain to paint.
Paint the Biome layer the same way to change the climate of an area, and the Topology layer to tell Rust what an area is, for example Beach or Road. See Paint tools.
4. Place a prefab
- Open the Content Browser. It is under the scene view in the default layout.
- Type a name in its search box, for example
rock, or open its folders. - Drag a prefab from the list into the scene view. It lands where you drop it.
- You can also double-click a prefab. It lands in the middle of the scene view.
- The new prefab is selected. Press W and drag the arrows to move it, or E to turn it.
- To put it back on the ground, press Ctrl+Alt+Mouse Middle with the mouse over the scene view.
See Content browser, Placing prefabs and Selection and transform.
5. Save the map
- Press Ctrl+Shift+S, or open .
- The first time, RustEdit asks where to save. Pick a folder and a name and save.
- With RustEdit Plus, the Map Password dialog opens. Leave Password empty for no password and click Save. See Map password.
RustEdit saves a .scene file. It keeps everything RustEdit knows about the map. Open it again later with .
6. Export a .map for your server
- Open .
- RustEdit saves the
.scenefile and writes a.mapfile with the same name in the same folder. - Notifications shows [World] Map Exported and the path of the file.
- Give the
.mapfile to your server. How you upload it depends on your server host. See Put the map on a server.
The .map file is the file a Rust server loads. See Export a map for what the export writes.
Keep the .scene file. It is the file you edit. Export a new .map every time you change the map.
Next steps
- Learn every panel: The interface.
- Draw roads and rivers: Splines.
- Let Rust's own generator make a map: Procedural generation.
- Walk your map as a player: Play mode.